
nginx could not build the server_names_hash 解决方法
nginx “nginx could not build the server_names_hash”解决方法 给一个服务器下增加了一些站点别名,差不多有20多个。 重启nginx时候,提示: could not build the server_names_hash, you should inc
nginx “nginx could not build the server_names_hash”解决方法 给一个服务器下增加了一些站点别名,差不多有20多个。 重启nginx时候,提示: could not build the server_names_hash, you should inc

思路非常简单: 1. httpserver获取需要还原的url; 2. 使用httpclient递归请求这个url,直到发现http status not in (302, 301)为止。 3. 返回还原的原url。 好吧,代码如下: 实现代码如下: var net = require('net')
首先建立下面的配置文件放在nginx的conf目录下面,命名为blocksip.conf: deny 95.105.25.181; 保存一下。 在nginx的配置文件nginx.conf中加入:include blocksip.conf; 重启一下nginx的服务:/usr/local/nginx/
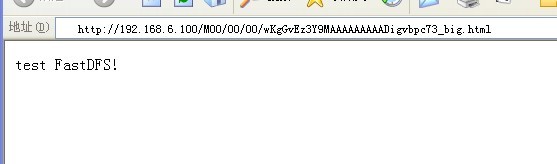
再回过头来看FastDFS更新很快,还看到fastdfs-nginx-module_v1.01.tar.gz nginx模块,所以今天在一台测试机上测试了·测试几天看稳定不稳定,在考虑换掉浪费资源的 lustre ! 环境:storage1:192.168.6.100storage2:192.168
相信做过awstats的都用过开源的geoip.datip数据库,刚好nginx wiki上有geoip 模块,这样就可以实现地区性的负载均衡,但是maxmind 的ip数据库对中国的支持不算太好,不过现在也不错了~ 参考文章:http://wiki.nginx.org/NginxHttpGeoIP
那么 在 nginx.conf 文件中对应的 server 段中 添加 location ^~ /test/ { auth_basic TEST-Login; auth_basic_user_file /root/htpasswd; 再在 root 的主目录中 /root/ 创建一个新文件 htpa
nginx 这个轻量级、高性能的 web server 主要可以干两件事情: 〉直接作为http server(代替apache,对PHP需要FastCGI处理器支持); 〉另外一个功能就是作为反向代理服务器实现负载均衡 以下我们就来举例说明如何使用 nginx 实现负载均衡。因为nginx在处理并
以下代码写入 server {....} 内 实现代码如下: if ($http_user_agent ~ ^$) { return 503; } if ($http_user_agent ~* "Mozilla/4.0\ \(compatible;\ MSIE\ 6.0;\ Windows\ NT
下载了 Nginx For Win32 的官方版本 nginx 0.7.53 进行了试用以及压力测试。 安装使用方式很简单,直接贴官方的方式: Win32 Binaries As of 0.7.52, Nginx is now available as an official Windows bin

我们先来看下nginx.confserver{listen80;server_namewww.a.com;index index.html index.htm index.php;root/data/htdocs/www.a.com/;#limit_conncrawler20;location ~